Why make your own energy bars?
Energy bars are designed to be a cheap and convenient source of nutrition. Their very name indicates that they provide energy, which mainly comes from macronutrients like carbohydrates, protein and fat. However, most store-bought energy bars are no better than candy bars. Despite marketing claims that they are good for you, many commercially made energy bars are often chock-full of added sugar and other harmful ingredients like high-fructose corn syrup (HFCS). HFCS has been linked to obesity and Type 2 diabetes. Store-bought energy bars are also tremendous let-downs because they are full of simple carbohydrates that are all too quickly digested and absorbed into your bloodstream, thereby raising your blood sugar levels. By making your own survival energy bars, you get to carefully select the ingredients you will use. This way, you don't have to worry about the health effects of added sugar, HFCS or simple carbohydrates. In addition, you can prepare large batches and cut them in the manner you prefer for easier storage in your stockpile or BOB. (Related: Food supply 101: Top 14 food items for your survival stockpile.)How to make survival energy bars from scratch
Survival energy bars are meant to keep you fed and nourished in a pinch, which is why they are usually high in calories. Those calories come from ingredients like nuts, grains, seeds, dried fruits, healthy oils and nut butters. Here's a closer look at the ingredients typically used to make survival energy bars:- Nuts – Nuts are a good source of heart-healthy unsaturated fats and carbohydrates. They are also rich in protein, which makes them an ideal protein source for vegans and vegetarians. Some of the most commonly used nuts in energy bars are cashews, almonds and walnuts.
- Fruits – Fruits are rich in antioxidants, which help protect cells from free radicals, and fiber, which promotes normal bowel movement and keeps you full for longer. Dried fruits are best for survival energy bars because they store well.
- Whole grains – Whole grains are packed with complex carbohydrates, which provide a stable source of energy. They are also very filling. Steel-cut and rolled oats are used in many energy bar recipes.
- Seeds – Seeds are great sources of fiber, healthy fats, vitamins, minerals and antioxidants. They provide high amounts of protein as well.
- Thickeners – Thickeners keep all of the other ingredients together. You can use coconut oil, sesame oil, organic maple syrup, raw honey and organic nut butters as thickeners. Stay away from any synthetic and non-organic ones.
Survival energy bar with rolled oats
These survival energy bars taste just as good as store-bought ones but without the added sugars and unhealthy ingredients. Ingredients:- 2 1/2 cups powdered milk
- 2 cups rolled oats
- 1 cup brown sugar
- 1/4 cup water
- 1/4 cup dried fruit powder
- 3 tablespoons raw honey
- Mix the oats, milk and sugar in a bowl.
- Mix the honey, dried fruit powder and water in a saucepan. Bring to a boil while stirring constantly.
- Remove from heat and pour into the dry ingredients. Mix well to form a dough.
- The dough will be stiff, so use a food processor or heavy-duty mixer to thoroughly mix the ingredients. If the dough is too stiff, add a teaspoon of water at a time and continue mixing until you can spread the dough onto a baking sheet.
- Cut into bars before baking at 200 to 250 F for 1.5 hours. If you have a dehydrator, you can process them at 150 F for four to five hours.

5 Incredible health benefits of drinking chamomile tea
By Skye Anderson // Share
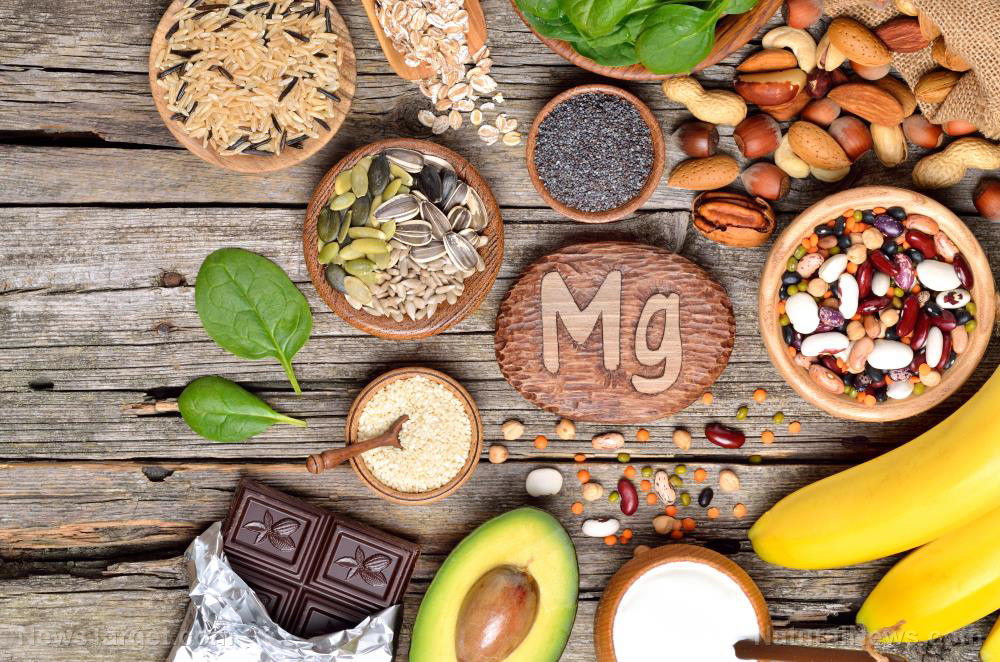
Boosting magnesium levels found to help reverse conditions like diabetes and heart disease
By Divina Ramirez // Share

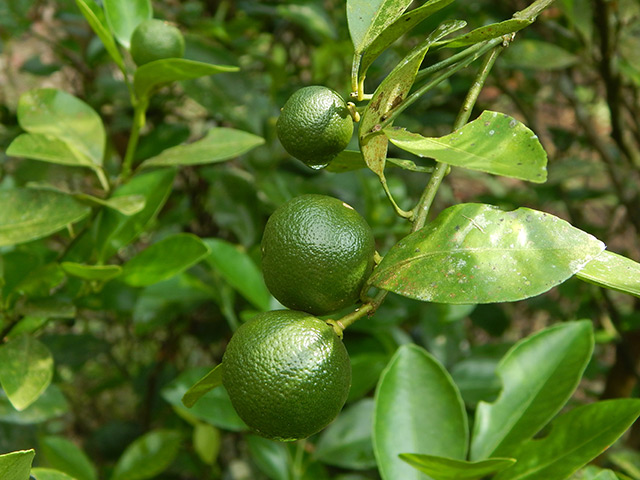
Prepper recipes: How to make long-lasting lemon energy bars
By Zoey Sky // Share

Mold, begone: 5 Non-toxic DIY mold cleaner recipes
By Virgilio Marin // Share
Top 5 health benefits of calamansi juice (recipes included)
By Joanne Washburn // Share

Looming threat of phytophthora blight may affect pumpkin pie fillings for Thanksgiving
By Mary Villareal // Share


Australian Father Awarded $4.5 Million in COVID-19 Vaccine Injury Compensation
By morganverity // Share

Secret Service Official: Threat Level Against Trump Is At All-Time High
By garrisonvance // Share
U.S. Government to Evaluate Offshore Nuclear Projects in Federal Waters
By edisonreed // Share
EU approves watered-down Russia sanctions package after Greek pressure on LNG transport
By garrisonvance // Share